Here's a post showing all the makeup items I use everyday and how exactly I use them! Most of the products I use daily are affordable and can be bought at drugstores, walmart, target, etc.
Product With General Pricing
- Maybelline Dream Pure BB Skim Clearing Perfector $7
- Rimmel Stay Matte Pressed Powder in Transparent $4
- Hard Candy Baked Blush in Living Doll $7
- Rimmel Natural Bronzer in Sunshine $4
- Rimmel Glam Eyes Eyeliner in Black $6
- Wet N Wild Eyebrow in Ash Brown $4
- Elf Eyebrow Treat & Tame in Ash $3
- L'Oreal Paris Miss Manga Eyes Mascara in Black $7
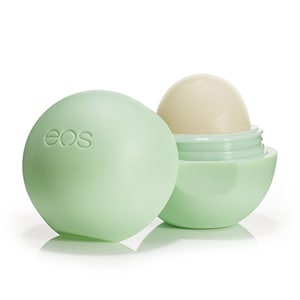
- Eos Lip Balm $3
Those are the general prices for what the products cost. Maybelline, Rimme, Hard Candy, L'Oreal and Eos are products that my local walmart carry. My local CVS and Rite Aid also carry Rimmel and Maybelline. The only place I have been able to get the Wet N Wild Eyebrow kit is at a drugstore called Drug Emporium, I have yet to find it elsewhere. Also, the Elf Eyebrow Treat & Tame has been hard for me to find again. Most of these items you can also order online.
As far as the shelf live for these items go, it's perfect for me. I don't usually have to buy any products for a couple months and this is with me applying makeup everyday. The eyebrow kit and treatment both last me a suuuuuper long time. I'm actually about out of my treat & tame so I'm in a rush to find it. I will advise that the eyebrow kit isn't line your typical pencil that you fill in your brows with, it's actually a powder kit that comes with a small angled brush which is my favorite thing to use to shape my brows and fill them in. The treat & tame is also a dual product; one end is a brush on color. If you're like me and have very light eyebrows, this is awesome after using the powder to define your brows. The brush on color actually goes on your hair folicals which makes your eyebrows look so much more natural because you're not seeing just a bland block of color on your brows, it actually appears like your eyebrow hair is the same color. The other end of the treat & tame is a gel, which is used to set the hairs in place. This is honestly my two favorite brow products I have EVER used.
My makeup routine is pretty basic and I may eventually make a tutorial to show the actual process for how I apply it, but for now here is the basic run down of how I use the above products.
- Apply Maybelline Dream Pure BB: I only press out about a half quarter size of the product. If my skin is having a breakout or is having an unusually red tone to it, I may need to use more or use a green primer to counter act the redness. PS Hard Candy has a really nice primer for this. I apply all over my face, blend downward into neck and chin line, as well as slightly into hair line. I apply with my finger tips, CLEAN hands for anyone who does this. I don't like to use a foundation brush because the outcome is not smooth. Another option for a smooth texture would be to use an application sponge.
- Apply Rimmel Powder with a large, round powder brush. You want to pat/brush the powder on, do not brush or run across the skin. This technique will help set your liquid foundation. I find it also helpful to let my liquid foundation sit on my skin for about a minute before applying a powder to finish. This allows time for the liquid to actually become blended into your skin before the powder is applied to finish setting it. For a more luminous look, you could also go over your initial setting powder with Elf studio high definition powder. This is a white powder that gives you a glowy sort of look; whenever I do use it I typical just apply to my checks, chin and forehead, basically following the line you would for a highlighter.
- After your base makeup is all set, it's time to use the Rimmel Bronzer. Now, I don't use this bronzer as an actual all over my face bronzer. This is because I'm very fair skinned. I don't typically get a lot of color in the spring and summer months, nor do I tan at all, so to use bronzer on myself doesn't really fit my skin tone much. I may use a little on my cheeks in the heat of the summer. I use this product as a contouring tool only. To apply, I use a small angled foundation brush. I apply just a small amount at a time, starting from the area where my face and top of my ear connect and brushing down at an angle just below the most prominent part of cheek. A good way to do this is to suck in your cheeks, aka make a fish face and run the brush along the cave in part. I just apply a little at a time as to not over do it and I usually make it a tad bit darker where my ear and face connect and blend into my hair line for a more natural contour. After that, if needed, I will take my pressed powder and brush to go in and blend if there are any harsh lines.
- Next is the Hard Candy Baked Blush in Living Doll. Simply apply this above the area where your just countered and blend out to the cheek area an appropriate for your cheeks. I use a medium sized foundation brush to apply. I usually apply above the contour area, covering my cheeks lightly and then reapply if I want it darker. I really love this blush, especially in the summer time because the baked aspect of it makes it go well with the bronze contour and on the few times where I do add more contour or am apply to bronze more, it gives a very pretty summer glow. I will say though that sometimes you need to reapply to get it to be noticeable.
- After the general face makeup is complete, I move on to my eyebrows, starting with the Wet N Wild eyebrow kit. Before apply any of the makeup, I groom my brows with an application brush, just to knock off any foundation that may have gotten stuck to the hair follicles, Once that is done, I take the angled brush and using the darker color of the kit, lightly line my brows. I start with the outer line of my brows to get the basic shape and then I go back to fill them in, making them darker at the outer corner and going lighter on the inner ends to give a more natural look. After that, I take the colored end of the treat & tame and go over my brows lightly. You do not want to roughly brush down on your brows because this will mess up the color filling you just did with the kit. Brush over lightly to apply the liquid color onto just the follicles. Once that is complete, use the gel end to sit and tame any loose brows to give the browns a finished look. When I plan on doing a more intense look with my eye makeup that may require the use of eye primer, I usually apply this before even doing my eyebrows, as not to get any primer on the brows after finishing them.
- Next is the application of the eye makeup starting with the Rimmel Eyeliner, Prior to starting to line my eyes, I usually put on a very nude eyeshadow. Something that is skin tone and has a very light sparkle to it. Any skin toned eyeshadow will do. I then apply my eyeliner. The liquid Rimmel eyeliner line is one of my favorites, also covergirl has a very nice set. I start at the inner corner of my eyelids and work to the outer corner, then I start forming my wing, which I will do a tutorial for eventually. To draw a perfect wing, my technique is to draw a slightly angled up line from the outer corner of my eye, making the length a little short. Once that is done, I finish drawing the eyeliner from the top of the eyelid, down and following the shape I want down to meet the end of the line I draw from the outer corner of my eye. Sounds confusing, I know, but it's really super easy. Once both eyes are done, I usually take a minute to make sure the wings are as even as possible.
- After the eyeliner application, I usually curl my lashes then apply the Manga Eyes Mascara. On occassion, I will line my lower eyes with a light brown eyeshadow using an angle brush, lining out up under the wing a little bit. If I choose to do that, I will before applying my mascara. Same goes for it I decided to deepen the crease of my upper lid. To curl my lashes, I use a simply lash curler that you can get anywhere, I actually bought mine from a dollar store. I really like the Manga Eyes Mascara, it extends my lashes well. However, after more than one application it can get clumped up very easily, so that is one downfall of it. A good alternative mascara I've used is from the NYX cosmetic line.
- Last step is to apply Eos chapstick. The kind I use comes in the egg shape and I don't typically use a certain flavor/type, any of them that are clear works well. I occasionally will use a light pink gloss or dap a little light pink lipstick before applying the chapstick to add more natural color.


That's about the extent of my every day makeup application! Here's a selfie to show off the general finished product!


0 comments:
Post a Comment